Mostrando entradas con la etiqueta cherry red. Mostrar todas las entradas

miércoles, 13 de noviembre de 2013

Sally Hansen Salon Effects en Laced Up


Les juro que tengo desde hace un año esta cajita de nail wraps de diseño con encaje llamadas Laced Up de Sally Hansen Salon Effects, y cuando se me ocurrió usarla para esta manicura la abrí con el temor de que ya estuvieran secas...pero no, estan en perfectas condiciones -fiiiuuu!!-. No traen fecha de caducidad así que yo creo que han de durar por siempre :D jejeje
Imagino que ya han escuchado y visto estas calcomanías especiales para uñas, quizás ya hasta las hayan probado. Les cuento que estas son de las primeras nail wraps que vi que salieron al mercado el año pasado y estan hechas de esmalte real, inclusive al abrir el paquetito huele a esmalte fresco. Es por eso que en la cajita indica que las wraps que no hayas usado al abrir el paquete, deberás tirarlas porque se secarán y ya no podrás usarlas. 

Pero no se preocupen, no crean que vienen las 16 tiras en un mismo empaque. Vienen divididas en dos empaques tipo blister y cada uno contiene 8 tiras. Así puedes usar un paquetito y completar las demás uñas con accent nails (como yo hice aquí) y guardar las otras 8 para después. Contiene además un instructivo, una lima-pulidor de uñas (2 en 1) y un palito de naranjo para empujar las cutículas hacia atrás, lo cual es un paso esencial en la apicación para que se vea muy lindo y natural. Aquí les dejo foto con el contenido de la caja:


Como son de puro esmalte les puedes aplicar top coat sin problema, aunque no lo necesitan. Pero yo sí usé tanto base coat como top coat. 
Noté que son muy delgadas y frágiles, así que debes despegarlas con cuidado porque se pueden romper. Pero por lo mismo, son muy flexibles y quedan completamente lisas, no dejan ninguna arruga en la uña. 


Les hice unos puntitos rojos al azar. En mi dedo anular usé Cherry Red de Sally Hansen Xtreme Wear (este rojo tiende a manchar las uñas por lo que recomiendo aplicar dos capas generosas de base coat) y lo decoré con unos glitters sueltos. En el meñique apliqué dos capas de Infinity Band de Sally Hansen Diamond Strength. 

No pude evitar tomar una foto con este perfume que combina con mis uñas :D
Prometen durar hasta diez días, pero eso es algo que no pude comprobar porque Desperator 3000 (o sea yo, :D) sólo las traje 5 días y medio. Pero durante este tiempo aguantaron bien sin despostillarse ni despegarse. Para removerlas recomiendo que dejen reposar tantito el algodón sobre la uña y ya después empiecen a tallar, porque cuesta un poquito mas de trabajo que un esmalte normal. O bien, pueden usar la técnica del papel aluminio

En conclusión, me encantaron estas nail wraps, su calidad es superior a las demás que he probado. Lo único "malo" podría ser que se deben usar las ocho de un jalón y el precio, pues son un poco caras. ¿Tú las has usado?

Por hoy las dejo, gracias por visitar el blog!
Besos!

lunes, 1 de octubre de 2012

RETO DE 31 DIAS Día 15: DELICATE PRINT

Hey girls!! Oh, I have to start by apologizing because I didn't have time to do something new for this challenge. I guess if I had my stamping equipment it would have been very easy to pull something off but since I don't have it already (only 2 more weeks to go!! yay!! ) ...I was a bit lazy to do nail art by hand this time. :(
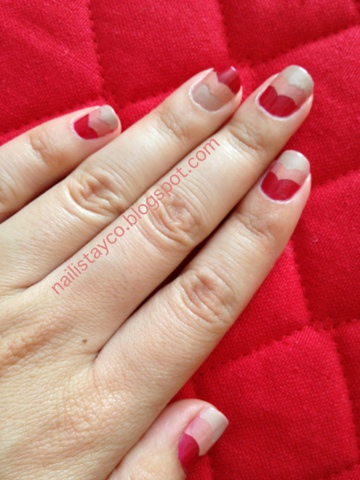
So... I will present something I did before I started the blog,  I saw this look a while ago on this website and I liked it a lot, I tried it and took pictures and even showed them off on some facebook pages of people I follow ^^. Here it is:


The word delicate makes me think of either flowers or hearts (I guess because it is commonly associated to all things femenine :P) and since we just did flowers, I went for the hearts. I hope you liked it :)

EN ESPAÑOL:
Hooolaaaa!! Antes que nada les pido una disculpa porque no tuve tiempo de hacer algo nuevo para este reto. Hubiera querido hacer algo de stamping pero todavía no tengo mi equipo! así que lo único que se me ocurrió fue presentarles este look que hice antes de iniciar el blog. Lo vi en este sitio, me encantó y lo probé. De hecho hasta lo publiqué en unas páginas de facebook!
Si visitas la página verás que viene como hacerlas, es sencillo, solo tienes que conseguir etiquetas redondas y entrelazarlas para crear el corazon.

 
Los colores que usé fueron:
Cherry Red- Sally Hansen Xtreme Wear
Classy- Revlon
Whimsical- LA Girl
 
 
Bueno, por hoy las dejo y nos vemos en el siguiente reto: estampado tribal!!!
 
No olviden checar los blogs de las demás chicas:
-Diana at Nails By Diana
-Meredith at Perfectly Polished
-Nicole at The Color Republic
-Sam at Polished Art
-Nicole at Nicole Gets Nailed
-Shelby at Shelby's Swatches
-Stephanie Louise at All Things Beautiful
-Liz and Lisa @ Lozlosa
-Mari at Nailista
-Miss L at Beauty by Miss L
-Gini at Sassy Paints
-Pam at Nail-E-Glance
 

sábado, 15 de septiembre de 2012

¡¡¡VIVA MEXICO!!!-Day 28 INSPIRED BY A FLAG


What? What? Day 28? Haha, I'll explain: tomorrow is Mexico's independence day, but the celebrations begin tonight at midnight so I had to be prepared with my nails! And I remembered that further along on the challenge we have this topic so I will get a little bit ahead on this one.

 
This is Mexico's flag:
 

So I took the colors and came up with this:


The colors I used were:
-White On- Sally Hansen Xtreme Wear
-White Cap- China Glaze
-Cherry Red- Sally Hansen Xtreme Wear
-Bright Green- L.A. Colors Art Deco
I first painted my nails white and then put a coat of White Cap which is a beautiful gold shimmer. Then I painted my tips diagonally with Cherry Red and finally with bright Green. At the end I put golden striping tape I got at Sally Beauty Supply. I came up with this design because I didn't want to do the flag so literal.


Then I got a little crazy and with an Ultra Fine Tipped Sharpie wrote ¡¡¡Viva Mexico!!! on my ring fingernail!

 
Have a great weekend!!^^

jueves, 13 de septiembre de 2012

31 DAY CHALLENGE Day 9: RAINBOW NAILS :) ...so sweet!!! / UÑAS DE ARCOIRIS

Hey girls! Today's menu: Rainbow Nails. I must admit I was not excited about this challenge and I postponed it as much as I could because I was thinking: rainbow? that reminds me of me in kindergarden carrying around my Rainbow Brite doll!-don't get me wrong I loved her so much, but this week I had to go to take care of some affairs and I kept thinking: the people at the offices are going to look at me like: what's with this lady and her toddler nails?!...
Aww!! Remember??
 
So I tried to think of a way in which I would enjoy them and I came up with the spun sugar nails!!! And now I love the way they look!!!^^


Here is the tutorial I watched:


Based on that, what I did was this:

I first put all the drops of all the colors at the same time on the surface (a yoghurt cap) and waited about 5 minutes for them to dry and become "stringy". I used about 4 large drops of every color on each hand.
The colors I used were:
-Base color: White On- Sally Hansen Xtreme Wear
-Noite Quente- Maybelline Colorama
-165-Bissú
-Green with Envy -Sally Hansen Xtreme Wear
-Sunshine Sparkle- Revlon
-Snappy Sorbet- Sally Hansen Insta-Dri
-Cherry Red- Sally Hansen Xtreme Wear

I know, I know. The rainbow should have 7 colors but I wanted to do only the colors we have done in the challenge :)

I didn't go nail by nail but color by color. Which means I did all the purple on the 5 nails of a hand, and then blue, and so on -to save time AND polish!-

When I finished I felt like if I didn't apply a topcoat it would be too vulnerable and I loved this mani so much I wanted to protect it. But I must say it is hard to apply a topcoat on this spun nails!!! And in the end I regretted it because it totally takes away the cool 3D effect the chubby strings had (shown below). Now they just look like plain lines :(


I also would like to say that this dries fast! I thought it would take forever but no, even before I applied my topcoat it was already superdry to the point that I could squash the little clumps and nothing happened o.O
It took me overall about two hours, but I had my baby running around and even had to change a diaper! Lol!!

Anyhow I love it!

EN ESPAÑOL:

No tenía nada de ganas de hacer este reto. Pensaba: Uñas de Arcoiris? me recuerda al jardín de niños y a Rainbow Brite. Y no es que no me gustara, pero esta semana tenía que hacer unos trámites y me daba un poco de vergüenza ir con mis uñas aniñadas.
Así que me puse a pensar de que manera podía hacerlas de un modo en que las disfrutara y entonces me tope con este vídeo en el que enseñan la técnica de "algodón de azúcar" refiriéndose a los hilitos que lo forman.
El resultado es impresionante y en 3D! Hacerlo es sencillo aunque un poco tardado. Empecé por poner 4 gotas de cada color en una superficie (por ejemplo, yo use la tapa de un yogurt) y esperé aprox unos 5 minutos a que se hiciera "chicloso" al moverlo con un palillo.
Empece a pasar los hilos color por color en todas las uñas, pero tu lo puedes hacer como te acomode, puede ser mejor uña por uña, el chiste es que funcione para ti y bueno, yo lo hice así tratando de no desperdiciar mucho esmalte ^^.
Después de limpiar lo que queda en la piel y admirar esta hermosa técnica, mi cabeza no dejaba de pensar en aplicar el topcoat (brillo). Así que lo hice. Y me arrepiento, porque le quito lo "gordito" a muchos de los hilitos :( ahora solo parecen líneas....
También quisiera mencionar que no tarda mucho en secar. Aunque parezca que esos hilitos gordos no secarán nunca, sí lo hacen.
Bueno, de cualquier modo yo quedé fascinada por el resultado ;) hasta la próxima!

I know, I stole some of my baby's toys for the pics! ^^
 
 
I will be checking out what the rest of my partners did!!
 
-Diana at Nails By Diana
-Aly at Wonderland Beauty
-Meredith at Perfectly Polished
-Nicole at The Color Republic
-Kate at The Painted Pony Nails
-Cee at Absolutely Cee
-Sam at Polished Art
-Nail Narcotics
-Nicole at Nicole Gets Nailed
-Shelby at Shelby's Swatches
-Stephanie Louise at All Things Beautiful
-Mixed Mama
-Joanna @ Sweet Polish of Mine
-Patty Greenberg
-Liz and Lisa @ Lozlosa
-Mari at Nailista
-Greta at How Was Your Day?
-Miss L at Beauty by Miss L
-Gini at Sassy Paints
-Chameleon Stampede
-Pam at Nail-E-Glance
-Me, Myself, and Polish

lunes, 20 de agosto de 2012

31 Day Challenge: RED NAILS / UÑAS ROJAS (español al final :)

Hey ladies! OMG the first day of the challenge and I feel like a total amateur!...and well, I am! ;)
I failed terribly at what I tried to do today for the Red Nails challenge...I did it again, and failed again :( ...so I thought whatever... I'll just post it like it is because my patience is gone!

So let's see....


I used Sally Hansen's Cherry Red which let me say it's a dream red, I looove it!...The formula is perfect, so perfect that with just one coat you're good to go. It has perfect coverage and the brush is one of those flat and wide ones that make the application so much easier! I also believe that this shade is the classic red that we've seen on nails forever.


For the gold triangles I used this golden shade called Shakira from  Lady Olé, a Spanish line sold here in Mexico (but I don't know in the U.S.) This polish is terrible! lol! really! the brush is thick and uneven, the formula stinks, it must be the most toxic formula!!...but it's the only one i had, so I used it. :)

I hope I do better on the next challenge!

Sweet Kimber from kimberslacquerkorner.blogspot.com organised this 31 Day Challenge in which every 3 days we'll be posting a different look using this calendar:

 
You should definitely check the looks from all the other ladies in the challenge, you'll get great ideas around one same color or topic!!
 

Y AHORA EN ESPAÑOL:

Es el primer día del reto de 31 días que organizo Kimber de kimberslacquerkorner.blogspot.com y me siento como una novata total!!!...bueno, porque lo soy...y mi idea de uñas rojas que es el primer look del calendario no resulto como yo esperaba, utilice cinta Scotch para hacer el triángulo y creo que el rojo no se había secado bien porque en algunas uñas se me despego!! fue una catástrofe total que después medio arreglé :)

El rojo que use es Cherry Red de Sally Hansen Xtreme Wear, este esmalte me encanta!, tiene cobertura perfecta para que te quede listo con una sola capa!!!! wow! y además su brocha es de esas nuevas planas y anchas que hacen que la aplicación sea super facil.

Para hacer el triángulo rojo use el tono Shakira de Lady Olé una línea española que si vives en Mexico seguro has visto en Walmart. Honestamente no me gusta nada y me avergüenza decir que son hechos en Mexico. Es el único dorado que tenía y pues ese usé :(

Aqui arriba esta el calendario de los colores, patrones e inspiraciones que usaremos en este reto, se hara un look diferente cada 3er día, estén al pendiente!!

Y tambien deberían visitar los blogs de las demás chicas que estan en el reto para que así obtengan más ideas para si siguiente manicure!

Hasta la próxima....

Marii