Mostrando entradas con la etiqueta Sunshine Sparkle. Mostrar todas las entradas

jueves, 4 de octubre de 2012

RETO DE 31 DIAS Día 16: TRiBAL PRiNT

 
Hey lovelies!! Today's challenge is Tribal print. I didn't know what exactly to do with this one and I didn't have a lot of time to do research so I just did the first thing that popped to my head! I had bought in advance a black nail polish pen that came sooo handy for this, I really don't know if it had been so easy to do without it.
 
 
EN ESPAÑOL:
Hola chicas!!! el tema de hoy es estampado "tribal"? mmm...no sé si existe esa palabra, pero ustedes me entienden no? jijiji y esto fue lo que se me ocurrio hacer. Lo hice con mucha prisa!, fue lo primero que se me vino a la mente, espero les guste:
 
 
Y como dicen en las entregas de premios: "nada de esto hubiera sido posible sin..." mi plumita de esmalte negro!!. Desde que vi que venía este tema en el reto andaba buscando esta pluma, estuve yendo a los Sanborn's que creo es el único lugar donde había visto que vendían unas plumas de Sally Hansen, pero solo tenían colores claros y aparte estaban carísimas. Hasta que se me ocurrió ir al centro de la ciudad y en un localito encontre esta belleza en 35 pesos!! Wow!
 
 
Colores Usados:
Sunshine Sparkle- Revlon
165- Bissú
1011 Mamey- Lady Olé
White On- Sally Hansen Xtreme Wear
 Stilógrafo Negro- Orgánix
 
Vamos a ver que hicieron las demás talentosísimas chicas!!
 

jueves, 13 de septiembre de 2012

31 DAY CHALLENGE Day 9: RAINBOW NAILS :) ...so sweet!!! / UÑAS DE ARCOIRIS

Hey girls! Today's menu: Rainbow Nails. I must admit I was not excited about this challenge and I postponed it as much as I could because I was thinking: rainbow? that reminds me of me in kindergarden carrying around my Rainbow Brite doll!-don't get me wrong I loved her so much, but this week I had to go to take care of some affairs and I kept thinking: the people at the offices are going to look at me like: what's with this lady and her toddler nails?!...
Aww!! Remember??
 
So I tried to think of a way in which I would enjoy them and I came up with the spun sugar nails!!! And now I love the way they look!!!^^


Here is the tutorial I watched:


Based on that, what I did was this:

I first put all the drops of all the colors at the same time on the surface (a yoghurt cap) and waited about 5 minutes for them to dry and become "stringy". I used about 4 large drops of every color on each hand.
The colors I used were:
-Base color: White On- Sally Hansen Xtreme Wear
-Noite Quente- Maybelline Colorama
-165-Bissú
-Green with Envy -Sally Hansen Xtreme Wear
-Sunshine Sparkle- Revlon
-Snappy Sorbet- Sally Hansen Insta-Dri
-Cherry Red- Sally Hansen Xtreme Wear

I know, I know. The rainbow should have 7 colors but I wanted to do only the colors we have done in the challenge :)

I didn't go nail by nail but color by color. Which means I did all the purple on the 5 nails of a hand, and then blue, and so on -to save time AND polish!-

When I finished I felt like if I didn't apply a topcoat it would be too vulnerable and I loved this mani so much I wanted to protect it. But I must say it is hard to apply a topcoat on this spun nails!!! And in the end I regretted it because it totally takes away the cool 3D effect the chubby strings had (shown below). Now they just look like plain lines :(


I also would like to say that this dries fast! I thought it would take forever but no, even before I applied my topcoat it was already superdry to the point that I could squash the little clumps and nothing happened o.O
It took me overall about two hours, but I had my baby running around and even had to change a diaper! Lol!!

Anyhow I love it!

EN ESPAÑOL:

No tenía nada de ganas de hacer este reto. Pensaba: Uñas de Arcoiris? me recuerda al jardín de niños y a Rainbow Brite. Y no es que no me gustara, pero esta semana tenía que hacer unos trámites y me daba un poco de vergüenza ir con mis uñas aniñadas.
Así que me puse a pensar de que manera podía hacerlas de un modo en que las disfrutara y entonces me tope con este vídeo en el que enseñan la técnica de "algodón de azúcar" refiriéndose a los hilitos que lo forman.
El resultado es impresionante y en 3D! Hacerlo es sencillo aunque un poco tardado. Empecé por poner 4 gotas de cada color en una superficie (por ejemplo, yo use la tapa de un yogurt) y esperé aprox unos 5 minutos a que se hiciera "chicloso" al moverlo con un palillo.
Empece a pasar los hilos color por color en todas las uñas, pero tu lo puedes hacer como te acomode, puede ser mejor uña por uña, el chiste es que funcione para ti y bueno, yo lo hice así tratando de no desperdiciar mucho esmalte ^^.
Después de limpiar lo que queda en la piel y admirar esta hermosa técnica, mi cabeza no dejaba de pensar en aplicar el topcoat (brillo). Así que lo hice. Y me arrepiento, porque le quito lo "gordito" a muchos de los hilitos :( ahora solo parecen líneas....
También quisiera mencionar que no tarda mucho en secar. Aunque parezca que esos hilitos gordos no secarán nunca, sí lo hacen.
Bueno, de cualquier modo yo quedé fascinada por el resultado ;) hasta la próxima!

I know, I stole some of my baby's toys for the pics! ^^
 
 
I will be checking out what the rest of my partners did!!
 
-Diana at Nails By Diana
-Aly at Wonderland Beauty
-Meredith at Perfectly Polished
-Nicole at The Color Republic
-Kate at The Painted Pony Nails
-Cee at Absolutely Cee
-Sam at Polished Art
-Nail Narcotics
-Nicole at Nicole Gets Nailed
-Shelby at Shelby's Swatches
-Stephanie Louise at All Things Beautiful
-Mixed Mama
-Joanna @ Sweet Polish of Mine
-Patty Greenberg
-Liz and Lisa @ Lozlosa
-Mari at Nailista
-Greta at How Was Your Day?
-Miss L at Beauty by Miss L
-Gini at Sassy Paints
-Chameleon Stampede
-Pam at Nail-E-Glance
-Me, Myself, and Polish

domingo, 26 de agosto de 2012

31 DAY CHALLENGE Day 3: YELLOW NAILS/ UÑAS AMARILLAS (español al final)


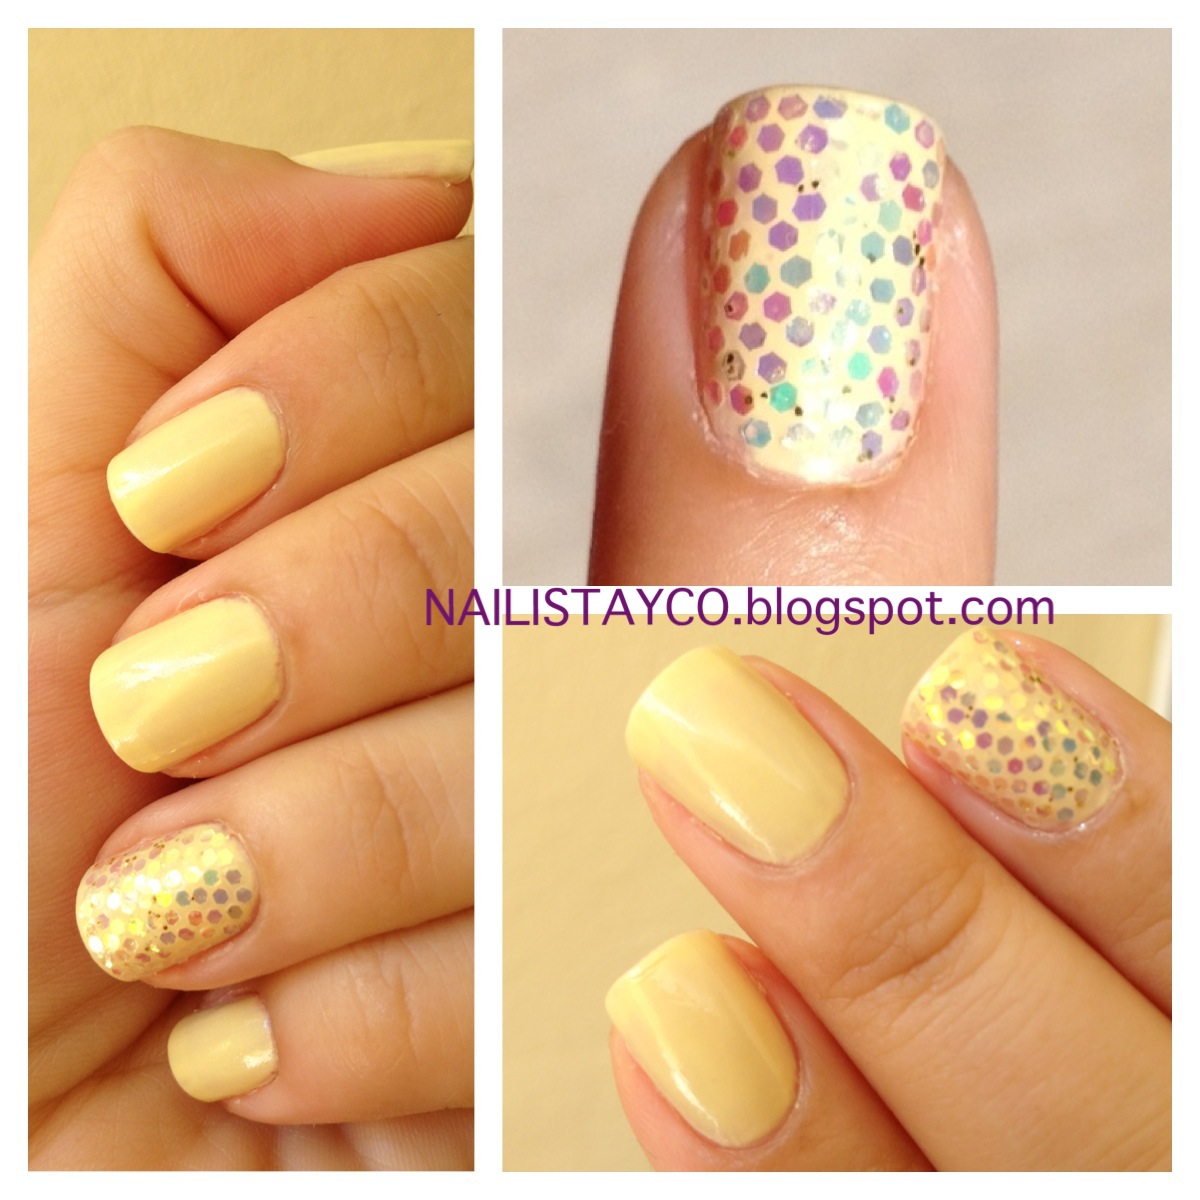
A couple days ago I watched a tutorial on you tube about "how to make honeycomb nails" and I loved the idea! I thought it would go well with the yellow nails....So I went and bought what I thought were gold glitter sequins to do the honeycomb, they didn't look exactly like the ones on the video but I thought they were similar.


When I got home and prepared them to put on my nails I realized they weren't gold! They were just like transparent holographic ones! I felt disappointed!! :( but I thought I'd give it a shot anyways...here's how they turned out... I loved them! Except that they don't look like honeycomb, they look more like a fish tail!! ;)


The polish is Revlon's Sunshine Sparkle, it is a subtle cream shimmery yellow, I like it a lot. This is the only yelow I own since I don't really love yellow nails, but I am loving the way they look right now!!!

I'll check out what the rest of you came up with to see if I start liking yellow nails a bit more ;)

-Kimber at Kimber's Lacquer Korner
-Kat at Hooked On Polish
-Diana at Nails By Diana
-Aly at Wonderland Beauty
-Meredith at Perfectly Polished
-Nicole at The Color Republic
-Kate at The Painted Pony Nails
-Cee at Absolutely Cee
-Sam at Polished Art
-Nail Narcotics
-Nicole at Nicole Gets Nailed
-Shelby at Shelby's Swatches
-Stephanie Louise at All Things Beautiful
-Mixed Mama
-Joanna @ Sweet Polish of Mine
-Patty Greenberg
-Liz and Lisa @ Lozlosa
-Mari at Nailista
-Greta at How Was Your Day?
-Miss L at Beauty by Miss L
-Gini at Sassy Paints
-Chameleon Stampede
-Pam at Nail-E-Glance

Have a nice sunday! ^^

PS: I really liked the honeycomb nails tutorial, (this girl is so original and talented!) and I think you will too so here it is!:


AHORA EN ESPAÑOL:

Hace poco encontre de pura casualidad un video en you tube de "como hacer uñas de panal" y me gusto muchísimo nunca había visto algo así. Así que me lance a buscar las lentejuelitas estas, pero como no quise ir al centro (donde probablemente sí la hubiera encontrado) fui a Sally y encontre estas que se veían similares pero cuando las abrí me di cuenta de que nooo!! para empezar son mas chicas, no son doradas sino holograficas transparentes y además traen brillitos chiquititos dorados que son un poco una pesadilla cuando solo quieres agarrar los grandes jeje...

El color que estoy usando es Sunshine Sparkle de Revlon. Es un amarillo pastel, cremoso, con brillitititos que casi no se notan muy lindo. No me encantan mucho las uñas amarillas así que este es el único amarillo que tengo.
Para aplicar las lentejuelas es sencillo. Hay que vaciar unas cuantas en una superficie, tomar un palillo y con él tomar un poco de esmalte transparente para que se pegue la lentejuela y ponerla sobre la uña.
Es importante que el esmalte de la uña esté aún un poco fresco para que se adhiera bien la lentejuela. Si te gana y se seca puedes poner una capa delgada de esmalte transparente para refrescar. De igual modo, al final le pasas una capa gruesa de brillo para proteger las lentejuelitas y que no se te caigan tan pronto.

Debo comentar que para quitarlo ufff!!!! Fue duro! Las lentejuelitas se pegaron durísimo a la uña no se porque! y hasta me "rayó" una uña, pero nada que no solucione pulirlas.

Me encantó como quedo aunque quizá el mio no parece tanto un panal sino escamas de pez, jiji ;)
Hasta la proxima!