lunes, 31 de diciembre de 2012

Black Gold to Say Bye-Bye to 2012!


Hello nailistas!!! Officially we're on the last hours of the year!!! So this is my last mani of the year as well. ^.^
 
Lately I've seen this quilted nails technique everywhere! And I think it is really cute, so I grabbed my Ciaté Mini 'paint pots' and got to work. It didn't take as long as I thought and it was pretty easy. I did a pictorial to show you how I did it
 
1. First of all you must choose your base colors. I used Twilight and on my ring finger Ladylike Luxe both by Ciaté. 
 
2 & 3. Then you stick the striping tape and do the gradient like you normally would.
 
4. Take off the tape to reveal your quilted nails!

 
Now on to the finishing touch, the 'caviar pearls' (I used Bumble Bee by Ciaté). I took a tiny plastic recipient and poured a few. Then I applied a coat of clear nail polish to make the surface 'sticky' and then some more on to the dotting tool to pick up the pearls. And that's it! Really quick right?


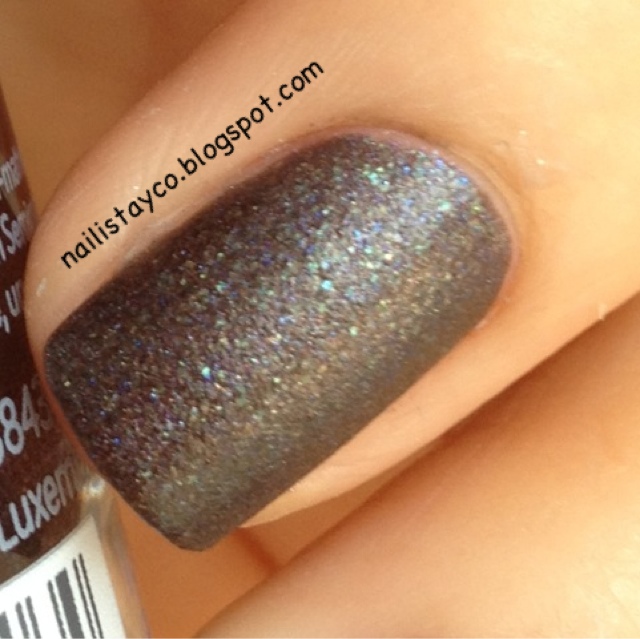
Now you would think if it is so fast and easy why didn't I do all the nails right?...well, I was lazy to cut a gazillion pieces of striping tape! Besides I really like the way they turned out. I did a simple gradient on my thumb and middle finger. But I realized that when I applied Ladylike Luxe over Twilight it didn't look as yellow, it looked more silver-y, so I picked up West End Wonderland by Butter London to do the gradient instead.
I hope you liked it as much as I did and try it too, you can use any colors you like!
 
Thank you so much for coming over, my best wishes for the new year 2013, may all your dreams come true! :D
 
P.S. All the Ciaté mini polishes are from the Ciaté Mini Mani Month advent calendar.


ESPAÑOL:

Hola nailistas!! Este es oficialmente el ultimo mani que haré este año jejeje... Ultimamente he visto esta técnica de "uñas acolchadas" en todas partes así que agarré mi mini calendario de Ciaté y decidí intentarlo. Hice un pictorial para mostrarles como lo hice.
 
1. Primero elige tus colores base yo usé Twilight y en mi dedo anular usé Ladylike Luxe ambos de Ciaté.
2 & 3. Pega la cintilla para formar el acolchado y haz el degradado con la esponja como lo harías normalmente.
 
4. El degradado seca casi al instante así que no debes esperar mucho. Retira la cintilla para revelar tu manicure acolchado!


Ahora el toque final las 'perlas de caviar' (Yo usé Bumble Bee de Ciaté). Tomé un pequeño recipiente y vacié ahí algunas. Aplique una capa de barniz transparente para hacer la superficie 'pegajosa' y tambien le puse tantito a mi palillo con el que recogí las perlitas para pegarlas en la uña. Y eso es todo! Bastante rápido verdad?
 
No hice todas las uñas así porque me dió flojera cortar y cortar pedacitos de cinta ;P pero me gustó muchisimo como quedó. En mi dedo medio y pulgar hice un degradado normal con dorado pero usé West End Wonderland  en lugar de Ladylike Luxe porque al poner este último sobre Twilight se veía más plateado.
 
Espero les haya gustado tanto como a mí y que lo intenten hacer.
 
Muchísimas gracias por visitar mi blog, mis mejores deseos para este año nuevo 2013, que la paz, salud y amor reinen en sus hogares hoy y siempre.
 
Muchos besos!!xx
 
Marii
 
PD: Todos los mini esmaltes de Ciaté son del calendario de adviento Ciaté Mini Mani Month.

domingo, 30 de diciembre de 2012

Pupa's 034...the blue goes on!!


Hey dears! How's your pre-New Year's Eve day going? I guess you're probably thinking...blue nails again?! ...Yep, that's right. I think I'm going through a phase :P
 
I'm loving and adoring this shade of blue I got yesterday. It's nameless unfortunately, but you can identify it with the number 034 by the super cute italian brand Pupa. This brand is most known by it's beautiful make up kits in incredibly pretty and well-designed red cases. I remember getting one when I was 13...long time ago!
 
I am really new at using holographic nail polish, so I can't really compare it. I can only tell you that it has a thin, fast-drying formula and smooth, semi-matte finish. I used two coats and then then topped it off with a coat of Sally Hansen's Insta Dri Clearly Quick.


My only complaint is the price. It is a mini bottle with a full size price...that can't be right! But it's just such a pretty color that to me, it was worth every penny! I just can't stop looking at my nails, searching for the light to reflect the holographic magic! *.*


ESPAÑOL:

Hola queridas! Como les va con la locura de las fiestas, la familia, las vacaciones, el tráfico y pfff...la comida?!! jeje...
Estoy encantada con este esmaltito que compré ayer. Es el 034 de la marca italiana Pupa. Me encantó el tono y tiene una muy buena fórmula. Es delgada, seca rápido y tiene un acabado liso y semi mate.
Usé dos capas y luego una de brillo de Sally Hansen Insta Dri Clearly Quick...claro, todo sobre una capa de Nail Envy Original de OPI, el mejor basecoat!!
 
Mi única queja es que el tamaño de la botella es muy pequeño y cuesta lo de una botella normal! Me costó $130 pesos en Liverpool. Pero valió la pena porque en verdad me gustó mucho y es de buena calidad. Les juró que no puedo dejar de verme las uñas y moverlas para ver la magia holográfica! *.*


viernes, 21 de diciembre de 2012

Christmas blues


Thank God the world hasn't ended so I can I show you my latest mani ;P . I love this shade of blue and I wanted it to look like sparkling snow so watch what I did!

As you can see, Kawaii Stuff dries semi-matte and is a one-coater!!


Hola nailistas! Hasta ahora el mundo no se ha acabado y puedo mostrarles mi mani mas reciente...jijiji...
 
La semana pasada vi unos hermosos tonos azules en el mostrador de Chanel y ya que la economía no está como para comprarlos, opté por usar un hermoso azul que ya tenía. Les presento a Kawaii Stuff de Kleancolor. Excelente cobertura, créanlo o no solo use una capa...una!!! y tiene un acabado semi-mate. Este mini-esmalte lo conseguí en Todo Moda.
 
Le hice unos copitos de nieve con ayuda de placa BM-323 de Bundle Monster y No Place Like Chrome de Essie.
Finalmente agregue una capa de Techno de China Glaze aunque en las uñas c on stamping solo puse unos pincelazos al azar porque no quería cubrirlas mucho.
 
Espero que les guste y tengan un hermoso y alocado fin de semana pre-navideño!!!

Look at all that holo-sparkleness!!!


miércoles, 19 de diciembre de 2012

Rudolph And His Red Nose!

 
Well hello nailistas!! ...It's been more than a week since my last post, I was so busy last week! But here I am.
I wanted to do a reindeer so badly, and I finally found the courage and the time! I did a small pictorial. They don't look perfect, but they are so cute and maybe you can make them better. I used the smallest nail art brush and for the black outline I used a nail art pen in black.


ESPAÑOL:
Hola chicas! wow ahora si que me tarde verdad? ups! Estuve muy ocupada la semana pasada y no me dieron ni ganas ni tiempo de hacerme mis uñas. Pero ya volví!
Estoy feliz porque tuve una navidad prematura! Hace dos semanas llegaron todos mis encargos de esmaltes y no puedo esperar a mostrarles todo! pero poco a poco iran viendo las nuevas adquisiciones ;)

Por ahora les explico como hice este reno no perfecto pero muy tierno.
1. Primero pinte la base con Da Bush de Essie, despues con Case Study tambien de Essie dibuje el cuerpo del reno.
2. Dibuje los ojitos con LA Colors Art Deco en White.
3. La nariz roja la pinte con Enchanted Rose de Ciaté (siiii les presumo que ya tengo mi calendario de adviento de Ciaté y esta increíble, =D no me canso de verlo chequenlo aquí)
4. Con un stilografo negro dibujé los ojitos y el contorno del reno.
5. Finalmente los cuernos los hice con Espresso de Revlon un café muy oscuro y el pincelito.


Cuando terminé los renos agregué puntitos blancos simulando nieve, si alcanzan a ver unos brillitos por ahi es porque le pasé una capa de Rock Candy de Sally Hansen Hard as Nails.


Ah! Y se me olvidaba que les queria enseñar estas que le hice a mi cuñada, son muy similares a las del renito solo cambian los colores;


domingo, 9 de diciembre de 2012

Caracoles!


Hello everybody! How's your sunday going? I know there are all sorts of Christmas manis going on out there but I wasn't inspired to do one this time.
 
I did this mani yesterday, it's not quite what I had in mind but I guess it's ok. I started off with one coat of OPI Nail Envy, then two coats of China Glaze's Spontaneous (which is such a perfect creamy purple!) and my original idea was to stamp it with OPI's DS Temptation but that definitely didn't work out. Although DS Temptation is a very opaque glitter it doesn't work for stamping I don't know what I was thinking!... So I reached for Metal Me Teal! by Maybelline Forever Strong Pro.
 
I used Mash-40 nail plate for the stamping and since I couldn't stamp with DS Temptation, I used it to do a few polka dots and add a bit of sparkle. Finished up with a coat of Seche Vite and voilà!


Hola a todas!!! Mmm...como que estos ultimos días no me he sentido inspirada para hacer diseños navideños... :). Así que les presentaré esto que hice ayer, no quedo exactamente como yo quería pero creo q es lindo.
 
Inicié con una capa de Nail Envy de OPI. Yo había leido toda clase de buenas referencias de esta basecoat pero no esperaba que en verdad funcionara, ya había probado bastantes esmaltes que prometían hacer tus uñas más fuertes y solo Uña Maravilla ( el verdecito que venden en Nutrisa) me funcionó un tiempo (pero apesta a ajo de una maneeraaa!!! eeewww!). Pero Nail Envy me ha funcionado super bien ya ni siquiera se me ponen amarillas las uñas! Antes tenía que descansar unos días del esmalte porque si no se "amarilleaban" pero ahora nooo!! es lo maximo!
 
Bueno. Regresando a mi manicure...aplique dos capas de Spontaneous de China Glaze e hice stamping con la placa Mash-40 y Metal Me Teal! de Maybelline Forever Strong Pro.
 
Originalmente quería hacer el stamping con DS Temptation un herrrrrmosisisisisimo glitter de OPI que tiene muy buena cobertura y debido a eso por un momento pensé que pudiera funcionar para el stamping pero nooo...buu :(
Así que como yo quería utilizar esta belleza al menos la use para hacer unos polka dots!

Que pasen un lindo domingo!!

Marii
=^.^=


jueves, 6 de diciembre de 2012

Steal my heart

Hello Ladies! Today I am presenting this beautiful color called Steel My Heart by Catrice. This polish has a lovely matte and (a little) rough finish. When I first saw it I thought it was brown but I guess it really is gray. Part of what makes this pretty are the green and blue micro glitters it contains.
 
On the first three pics below it is shown without a topcoat. Because it has that "brushed metal effect" I believe it is better to wear it alone but I wanted to see how it looked like with a topcoat on, so I applied it, but ended up regretting it because it makes it look darker as you can see on the pics.

It really is a matter of the finish you prefer, but still...Steel my Heart is a beautiful shade. :)


Direct sunlight, no topcoat.


ESPAÑOL:

Hola nailistas! Hoy les presento este esmalte llamado Steel my Heart de la marca alemana Catrice. Es un esmalte gris oscuro con pequeños micro glitters verdes y azules y un acabado matte que hacen de este un esmalte muy original. La primera vez que lo vi yo pense que era café pero creo que veo mal jaja...
 
En las primeras fotos se muestra tal cual queda despues de dos capas y quise probar como se vería con una capa de brillo, pero creo que solo lo hace más oscuro,  a mí me gusta más mate.
 
Yo acabo de conocer esta marca Catrice, jamás me imaginé encontrarla en México pero se me presento muy chistoso...iba entrando al Palacio de Hierro en el área de juguetes y ahí estaba... un pequeño exhibidor con todo desde esmaltes hasta correctores y polvos!

Los esmaltes están en muy buen precio (cincuenta y tantos pesos) y tienen colores super lindos y muy buena calidad (como todo lo alemán).
 
Además de comprar los esmaltes, también compre un estuchito de correctores faciales que esta genial porque trae el corrector rosa, verde y tres tonos diferentes de color carne. Me pareció genial porque si compras cada uno te sale carisimo y este estuche trae todos para que te maquilles super bien y no pasa de cien pesos!!
¿Has probado alguna vez esta marca? ¿Has visto en donde más la venden?
 
En fin, por ahora las dejo espero les haya gustado este esmalte. Saludos!!
 
Marii

martes, 4 de diciembre de 2012

Christmas time is here!!!...

 
Hello nailistas!! Today I have Christmas string lights-inspired nails for you! I saw this a long, long time ago at The Beauty Department and I thought "well, now's the time to try them on!"
 

If you check out the link above you'll find the tutorial. I changed the colors, and my only advice would be to stick the string to the nail by applying the clear polish to the string, not to the nail (as it shows in the picture below). That will give you a better chance to put the string right where you want it and then you can secure it applying a topcoat.

 
I used a dotting tool to draw the "lights" and I used aaaaaaaall the colors below!! (all by Kleancolor)
And the base is Voodoo (yes, again!) by LA Colors Color Craze.


Honestly it is not hard to do at all, I just think I messed up with the base color, it should have been lighter. Maybe white like on the tutorial for the colors of the "lights" to really pop.
All in all, I'm enjoying my mani, have a good night!

ESPAÑOL:

Hola nailistas! Hoy les presento estas uñas inpiradas en las luces navideñas. Vi esta idea hace mucho tiempo en The Beauty Department y pensé que ahora era el momento para intentarlo.


Si abren en link de arriba encontrarán el tutorial en inglés. En sí es muy sencillo solo aplicas tu color base (recomiendo que usen uno más claro que el que yo usé para que realmente sobresalgan los colores de las luces), después pegas un hilo en la uña aplicando un poquito de esmalte transparente directamente en el hilo y lo acomodas en la forma que quieras sobre la uña.
Por ultimo, dibujas los foquitos de colores. En la foto de arriba puedes ver los colores que utilicé, todos de Kleancolor y como base use nuevamente...Voodoo de LA Colors Color Craze.


miércoles, 28 de noviembre de 2012

Autumn inspired nails...

Hi ladies! A very quick post today...
 
I know we still have about three more weeks of autumn but in some places winter is already announcing its arrival with a few snow storms (family in Canada told me so!) so this is my bye-bye autumn mani. I used Chic by Revlon as a base and then I stamped Bundle Monster's BM-316 with Copper Penny.


ESPAÑOL:
Hola mujeres! Espero que su semana vaya bien. Hoy les presento un manicure inspirado en las hojas secas del otoño. Lo hice a modo de despedir el otoño porque aunque aun le queda casi un mes a esta temporada, en algunos lugares del mundo el invierno ya esta anunciando su próxima llegada con tormentas de nieve.
 
Como base use Chic de Revlon y luego utilicé la placa BM-316 de Bundle Monster con Copper Penny tambien de Revlon. En estas fotos Copper Penny se ve dorado pero en realidad es bronce.

Espero que les haya gustado, hasta la próxima!!!


lunes, 26 de noviembre de 2012

Marshmallows & confetti

Hi ladies!!!! Tonight I have a super girly mani going on. This is one coat of Pizzazz from China Glaze Holiday Joy Collection 2012 over Essie's Marshmallow. Nothing extraordinary, just really pretty glitter.


Marshmallow is a soft white which provides a great base for multicolored glitters. This is how it looks on its own after two coats:


And Pizzazz is all I could ever ask for in a multi colored glitter. It has all the colors in! Silver, purple, orange, green, yellow and blue. It just looks so pretty!!


ESPAÑOL:

Hola nailistas! como pasaron el fin de semana?...Hoy les tengo esta divinura de glitter que se llama: Pizzazz (significa algo así como extravagante, no tiene nada que ver con comida italiana! jajaja!!) de la colección Holiday Joy 2012 de China Glaze. Primero que nada me debo disculpar con la tienda Sally Beauty Supply Mexico porque anteriormente me había decepcionado mucho, siempre que iba no encontraba nada, preguntaba y las señoritas me decían:...si...llega en la semana....volvía a ir y nada! Lo cual me hacía pensar que tenían muy mal surtido y nunca les llegaba nada de lo nuevo, hasta ayer...
 
Casualmente visité el centro comercial para comprar un regalito y TENIA QUE pasar a ver que había y me tope con este solitario Pizzazz cerca de la caja y pregunte: Señorita, ¿ya no tienen más de estos?...y al fin me atendió una señorita amable, que me explico que las nuevas colecciones las ponen cerca del aparador (que esta por donde están los artículos para el cabello) y no donde están los racks con todos los esmaltes, por lo que yo jamás pasaba por ahí!. Ustedes comprenderán que siempre voy cuidando que mi bebe no rompa nada y entro y salgo lo más rápido posible...jamás se me había ocurrido buscar ahí!!
 
Naturalmente como era domingo y les surten los jueves, no quedaban muchos. Sólo compre este y Winter Holly (ya se los mostraré más adelante) había otros pero no me encantaron. Creo que deberían de pedir más producto para que no se les acabe tan rápido y sus clientas no se decepcionen.
 
Y bueno así fue mi travesía por Sally...también en Liverpool tenía mucho que no buscaba esmaltes y vi que ya se surtieron muy bien de China Glaze, inclusive había unos cuantos Seche Vite a precio normal, lo mismo que cuesta en Estados Unidos. Genial no?
 
Regresando a mi manicure...utilicé como base Marshmallow de Essie que es un blanco transparentoso :) esta lindo es muy suave...no es un blanco ordinario que resalte mucho sino 'neutral'. Saben como que parece? Parece pegamento blanco! justo así es. Y encima puse una sola capa de Pizzazz, que es un glitter multi color que parece confetti. Tiene plateado, morado, amarillo, verde, naranja y azul. El resultado es un manicure muy tierno y femenino no les parece? Use una sola caps porque me gusta el glitter disperso pero imagino q con unas tres capas debe quedar saturado y con buena cobertura.


jueves, 22 de noviembre de 2012

A little Voodoo...


Hi lovely ladies! Happy Thanksgiving! I hope you have a wonderful celebration in this special time of year. Here in Mexico, as in many more countries, is just an ordinary thursday though :) we still have to wait one more month to eat that yummy turkey!... but we can definitely feel the holiday season coming up. Some neighbors and me have already all our Christmas decorations up.

This is my first mani post-challenge and I was a bit mind-blocked about what to do. This time I had to go through all my nail polishes and think of something! That doesn't happen often, I usually have an idea in my mind and maybe swing between colors, but that's it. Finally, I came up with a holographic tape mani.

I used Voodoo by LA Colors Color Craze, a beautiful emerald green as a base and then I did a triangle with Jade Groove by Layla Hologram Effect. I had never used holographic nail polish I was surprised by it's consistency, it seems that it has that it has to be applied in very few streaks and fast otherwise it becomes goopy.

And Voodoo....wow! you know this is super cheap nail polish (LA Colors), but it went on like butter and had a super soft finish. That is something I love about this brand. It may not be the best or most exclusive but it works really well and they have amazing colors. Have you ever tried them?

Well, that's going to be it for me...have a great day!


ESPAÑOL:

Hola chicas! Este es mi primer manicure después del reto y esta vez tuve que repasar tooodooos mis esmaltes para ver que se me ocurria hacer. Fue un poco frustrante porque casi siempre ya tengo la idea en mi cabeza y solo tengo que elegir los colores pero esta vez estaba un tanto bloqueada!

Vi este precioso verde esmeralda Voodoo de LA Colors Color Craze y decidi usarlo...esta increíble, además de que a pesar de que estos esmaltes son super baratos no esta nada pero nada mal. Tiene super buena cobertura y un acabado super liso. Nada de pincelazos, no, no, perfecto! Yo los consigo en Todo Moda a $20 pesos... fabuloso no? Eso sí, tienes que andarlos "pescando" porque no siempre tienen todos los colores, asi que cuando veas uno que te guste compralo! quiza a la proxima vez ya no esté.


El esmalte que usé para los triángulos es el tono 05 Jade Groove de la línea Hologram Effect de Layla. Nunca había usado un esmalte holográfico así que no conocía su consistencia. Se debe aplicar rápido y sin pasar muchas veces el pincel porque se hace chicloso...y después de unos segundos...taa-daa! el efecto holografico se revela! Súper!

Espero que les haya gustado y que tengan un lindo día!