miércoles, 29 de agosto de 2012

31 DAY CHALLENGE Day 4: GREEN NAILS / UÑAS VERDES!!!

Yay!! green nails!! I have 2 looks for you this time :D
I couldn't wait to wear this nail polish I bought last weekend! It is Cactus by L.A. Colors Color Craze. It is a dark dry green with a lot of gold shimmer and a navy blue base. I was kind of tired of the cream polishes since my greatest love are shimmery polishes :P Though I used one cream polish for the accent nail, I turned it into shimmer by using White Cap by China glaze.^^

So I didn't do anything artsy this time...don't you feel sometimes like a polish is so pretty on its own that you just want to let it shine alone?
Let me show you the pix:


My partners in crime:


My friend Linda did something last week that is totally worth showing on this green nails challenge!! I had seen this before, but I loved the way she made it like a french manicure, and she did this by hand! she's sooo talented!! I can't stop looking at that bitten thumb... it's so cute!


Don't miss the creations of these lovely ladies:

-Kimber at Kimber's Lacquer Korner
-Kat at Hooked On Polish
-Diana at Nails By Diana
-Aly at Wonderland Beauty
-Meredith at Perfectly Polished
-Nicole at The Color Republic
-Kate at The Painted Pony Nails
-Cee at Absolutely Cee
-Sam at Polished Art
-Nail Narcotics
-Nicole at Nicole Gets Nailed
-Shelby at Shelby's Swatches
-Stephanie Louise at All Things Beautiful
-Mixed Mama
-Joanna @ Sweet Polish of Mine
-Patty Greenberg
-Liz and Lisa @ Lozlosa
-Mari at Nailista
-Greta at How Was Your Day?
-Miss L at Beauty by Miss L
-Gini at Sassy Paints
-Chameleon Stampede
-Pam at Nail-E-Glance
-Me, Myself, and Polish

AHORA EN ESPAÑOL!

El fin de semana pasado fui a Todo Moda y encontré unos barnices herrrrmosisimos!!! y pues como no estan caros me compré varios jijiji....Todo Moda se esta conviertiendo en mi lugar preferido para comprar esmaltes. Sé que no son de súper marca pero están bien y hay unos coloooreeeess!!! bueno, que te digo de seguro que tu tambien has comprado uno que otro ahi ;)

Entre esos estaba este hermoso verde: Cactus de L.A. Colors Color Craze. Este esmalte no se parece a ninguno que haya visto antes. Es un verde oscuro con base azul marino (se lo que piensas: azul con verde? what?) pues así! jaja y super saturado de brillitos dorados, esta padrísimo.
La formula es bastante delgada pero cubre bien, con dos capas es suficiente. Y seca rapidísimo.
En las "accent nails" use Green with Envy de Sally Hansen Xtreme Wear y como es un esmalte cremoso lo volví iridiscente con White Cap de China Glaze. Además le agregué unas hojitas doradas que tenía desde hace años!

Muy sencillo? sí. Esta vez no quise hacerle nada porque el simple esmalte es taaaan hermoso!! aaaahhh!!!

Y mi amiga del alma hizo un manicure francés con manzanitas divino!! no crees? Me mata el pulgar mordido!

domingo, 26 de agosto de 2012

31 DAY CHALLENGE Day 3: YELLOW NAILS/ UÑAS AMARILLAS (español al final)


A couple days ago I watched a tutorial on you tube about "how to make honeycomb nails" and I loved the idea! I thought it would go well with the yellow nails....So I went and bought what I thought were gold glitter sequins to do the honeycomb, they didn't look exactly like the ones on the video but I thought they were similar.


When I got home and prepared them to put on my nails I realized they weren't gold! They were just like transparent holographic ones! I felt disappointed!! :( but I thought I'd give it a shot anyways...here's how they turned out... I loved them! Except that they don't look like honeycomb, they look more like a fish tail!! ;)


The polish is Revlon's Sunshine Sparkle, it is a subtle cream shimmery yellow, I like it a lot. This is the only yelow I own since I don't really love yellow nails, but I am loving the way they look right now!!!

I'll check out what the rest of you came up with to see if I start liking yellow nails a bit more ;)

-Kimber at Kimber's Lacquer Korner
-Kat at Hooked On Polish
-Diana at Nails By Diana
-Aly at Wonderland Beauty
-Meredith at Perfectly Polished
-Nicole at The Color Republic
-Kate at The Painted Pony Nails
-Cee at Absolutely Cee
-Sam at Polished Art
-Nail Narcotics
-Nicole at Nicole Gets Nailed
-Shelby at Shelby's Swatches
-Stephanie Louise at All Things Beautiful
-Mixed Mama
-Joanna @ Sweet Polish of Mine
-Patty Greenberg
-Liz and Lisa @ Lozlosa
-Mari at Nailista
-Greta at How Was Your Day?
-Miss L at Beauty by Miss L
-Gini at Sassy Paints
-Chameleon Stampede
-Pam at Nail-E-Glance

Have a nice sunday! ^^

PS: I really liked the honeycomb nails tutorial, (this girl is so original and talented!) and I think you will too so here it is!:


AHORA EN ESPAÑOL:

Hace poco encontre de pura casualidad un video en you tube de "como hacer uñas de panal" y me gusto muchísimo nunca había visto algo así. Así que me lance a buscar las lentejuelitas estas, pero como no quise ir al centro (donde probablemente sí la hubiera encontrado) fui a Sally y encontre estas que se veían similares pero cuando las abrí me di cuenta de que nooo!! para empezar son mas chicas, no son doradas sino holograficas transparentes y además traen brillitos chiquititos dorados que son un poco una pesadilla cuando solo quieres agarrar los grandes jeje...

El color que estoy usando es Sunshine Sparkle de Revlon. Es un amarillo pastel, cremoso, con brillitititos que casi no se notan muy lindo. No me encantan mucho las uñas amarillas así que este es el único amarillo que tengo.
Para aplicar las lentejuelas es sencillo. Hay que vaciar unas cuantas en una superficie, tomar un palillo y con él tomar un poco de esmalte transparente para que se pegue la lentejuela y ponerla sobre la uña.
Es importante que el esmalte de la uña esté aún un poco fresco para que se adhiera bien la lentejuela. Si te gana y se seca puedes poner una capa delgada de esmalte transparente para refrescar. De igual modo, al final le pasas una capa gruesa de brillo para proteger las lentejuelitas y que no se te caigan tan pronto.

Debo comentar que para quitarlo ufff!!!! Fue duro! Las lentejuelitas se pegaron durísimo a la uña no se porque! y hasta me "rayó" una uña, pero nada que no solucione pulirlas.

Me encantó como quedo aunque quizá el mio no parece tanto un panal sino escamas de pez, jiji ;)
Hasta la proxima!


jueves, 23 de agosto de 2012

31 DAY CHALLENGE Day 2: ORANGE NAILS / UÑAS NARANJAS


Hi! The thing I love about this challenge is that it is making me use colors that I didn't want to wear anymore. I got this shade Snappy Sorbet from Sally Hansen Insta-Dri thinking it could be a softer shade of orange, I hadn't worn it before and... surprise, surprise!, you can almost say it is neon!! ha ha ha....but I like that under white light it looks pink. And it does dry fast.


I thought of clashing it with a mysterious color that I also hadn't worn: Chic from Revlon. It is kind of an indigo blue, very different from any color I've seen. I loved the way these two look together. I didn't use scotch to paint the tips, I just took the brush and painted diagonally, it was easier than I thought although I did have to redo a few.
This time I loooved my mani! Simple but different. It reminds me of the graphic color blocking from the 80´s. I plan to wear it as long as the next challenge arrives!! ^^


I suggest you check the creations from the rest of the girls at the challenge for more tips and ideas!

-Kimber at Kimber's Lacquer Korner
-Kat at Hooked On Polish
-Diana at Nails By Diana
-Aly at Wonderland Beauty
-Meredith at Perfectly Polished
-Nicole at The Color Republic
-Kate at The Painted Pony Nails
-Cee at Absolutely Cee
-Sam at Polished Art
-Nail Narcotics
-Nicole at Nicole Gets Nailed
-Shelby at Shelby's Swatches
-Stephanie Louise at All Things Beautiful
-Mixed Mama
-Joanna @ Sweet Polish of Mine
-Patty Greenberg
-Liz and Lisa @ Lozlosa
-Mari at Nailista
-Greta at How Was Your Day?
-Miss L at Beauty by Miss L
-Gini at Sassy Paints
-Chameleon Stampede
-Pam at Nail-E-Glance

 Marii

 Y AHORA EN ESPAÑOL:

Lo que me encanta de este reto es que me hace usar colores que ya no quería. Hace tiempo compré Snappy Sorbet de Sally Hansen Insta-Dri pensando que sería un tono más bajito de naranja y cual fue mi sorpresa al ver que es casi neon! pero aun asi me gustó, me gusta que bajo la luz blanca se ve casi rosa.

Lo contraste con este tono misterioso de azul Chic de Revlon, me encantó como se ven juntos estos 2.

Esta vez no use cinta Scotch para pintar las puntas, lo hice solo con mi manita! y debo decir que fue más facil de lo que pensaba.

No olvides checar los demas blogs del reto para mas tips e ideas.


lunes, 20 de agosto de 2012

31 Day Challenge: RED NAILS / UÑAS ROJAS (español al final :)

Hey ladies! OMG the first day of the challenge and I feel like a total amateur!...and well, I am! ;)
I failed terribly at what I tried to do today for the Red Nails challenge...I did it again, and failed again :( ...so I thought whatever... I'll just post it like it is because my patience is gone!

So let's see....


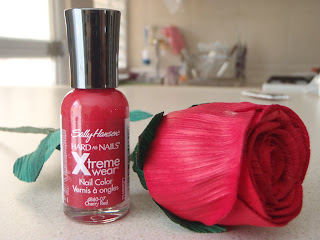
I used Sally Hansen's Cherry Red which let me say it's a dream red, I looove it!...The formula is perfect, so perfect that with just one coat you're good to go. It has perfect coverage and the brush is one of those flat and wide ones that make the application so much easier! I also believe that this shade is the classic red that we've seen on nails forever.


For the gold triangles I used this golden shade called Shakira from  Lady Olé, a Spanish line sold here in Mexico (but I don't know in the U.S.) This polish is terrible! lol! really! the brush is thick and uneven, the formula stinks, it must be the most toxic formula!!...but it's the only one i had, so I used it. :)

I hope I do better on the next challenge!

Sweet Kimber from kimberslacquerkorner.blogspot.com organised this 31 Day Challenge in which every 3 days we'll be posting a different look using this calendar:

 
You should definitely check the looks from all the other ladies in the challenge, you'll get great ideas around one same color or topic!!
 

Y AHORA EN ESPAÑOL:

Es el primer día del reto de 31 días que organizo Kimber de kimberslacquerkorner.blogspot.com y me siento como una novata total!!!...bueno, porque lo soy...y mi idea de uñas rojas que es el primer look del calendario no resulto como yo esperaba, utilice cinta Scotch para hacer el triángulo y creo que el rojo no se había secado bien porque en algunas uñas se me despego!! fue una catástrofe total que después medio arreglé :)

El rojo que use es Cherry Red de Sally Hansen Xtreme Wear, este esmalte me encanta!, tiene cobertura perfecta para que te quede listo con una sola capa!!!! wow! y además su brocha es de esas nuevas planas y anchas que hacen que la aplicación sea super facil.

Para hacer el triángulo rojo use el tono Shakira de Lady Olé una línea española que si vives en Mexico seguro has visto en Walmart. Honestamente no me gusta nada y me avergüenza decir que son hechos en Mexico. Es el único dorado que tenía y pues ese usé :(

Aqui arriba esta el calendario de los colores, patrones e inspiraciones que usaremos en este reto, se hara un look diferente cada 3er día, estén al pendiente!!

Y tambien deberían visitar los blogs de las demás chicas que estan en el reto para que así obtengan más ideas para si siguiente manicure!

Hasta la próxima....

Marii
 

viernes, 17 de agosto de 2012

Minted & Lively Lilac

Este tono Minted de Revlon me encanta! siento que queda muy bien para el verano pero también para el otoño para combinar con toda esa ropa linda que salió en tonos pastel :)

En lo que esperaba para secarse me di cuenta de lo lindo que luce este color por si solo...a poco no?


Y bueno pues ya que andamos en esto....se me ocurrió hacerle unas decoraciones que vi una vez en un bikini a ver si les gusta:


Hacer esto es super fácil y en verdad no toma mucho tiempo, siempre digo que en lo que mas me tardo es en esperar a que sequen las primeras 2 capas!! ...y si es cierto, trato de esperar al menos 40 minutos después de aplicar el primer color antes de empezar con el nail art porque por ejemplo, en este caso hay que poner estampitas para formar el corazón lila y si no ha secado bien el color de abajo...horror!!! se te viene el barniz a la hora de despegar la estampita!! noooo!!!..Así que es mejor esperar, y ya cuando pones la capa del decorado y los puntitos les juro que seca rapidísimo y te puedes ayudar de un topcoat de secado rápido como Seche Vite o Insta-Dry de Sally Hansen.

Aquí les pongo una fotito de como puse las estampas para formar el corazón:


El tono Lila es Lively Lilac de Rimmel y para los puntos volví a ocupar Minted. Utilice un palito para bajar la cutícula para hacer los puntos, pero puedes usar cualquier cosa desde un lápiz hasta un palillo o un alfiler.
Hasta la próxima ;)

domingo, 12 de agosto de 2012

Aqui empezamos!

Hola! A mi me encanta checar varios blogs de nail art para checar nuevas ideas y adaptarlas a mi gusto y si tu eres como yo tambien te podrás inspirar de algunas cositas que se me ocurre hacer...enjoy!!!